Naked 3 Palette Tutorial!
You can use any similar colors. I will show the color and swatches in the tutorial if you want to use different shadows.

First, unless otherwise specified you will always use a windshield wiping motion in the crease going back and forth just at the top of your crease and right above it. Not actually in your crease since that gets on your lid and makes your eyes look smaller unless you would rather do it that way but for my exact look these are the techniques used. In the outer third and outer V you will use small circular motions and if asked to blend into the crease you will do small circular motions THAN windshield wiping motion into the crease in that order. On the actual lid you will do a patting motion with your small eyeshadow brush. You will use that same motion in your inner V and inner eye. You will use a swiping, blending motion for the area under the brow and above the crease color. Directly below the brow line and for liner on top lashes and waterline you will use a drawing motion.
TUTORIAL:

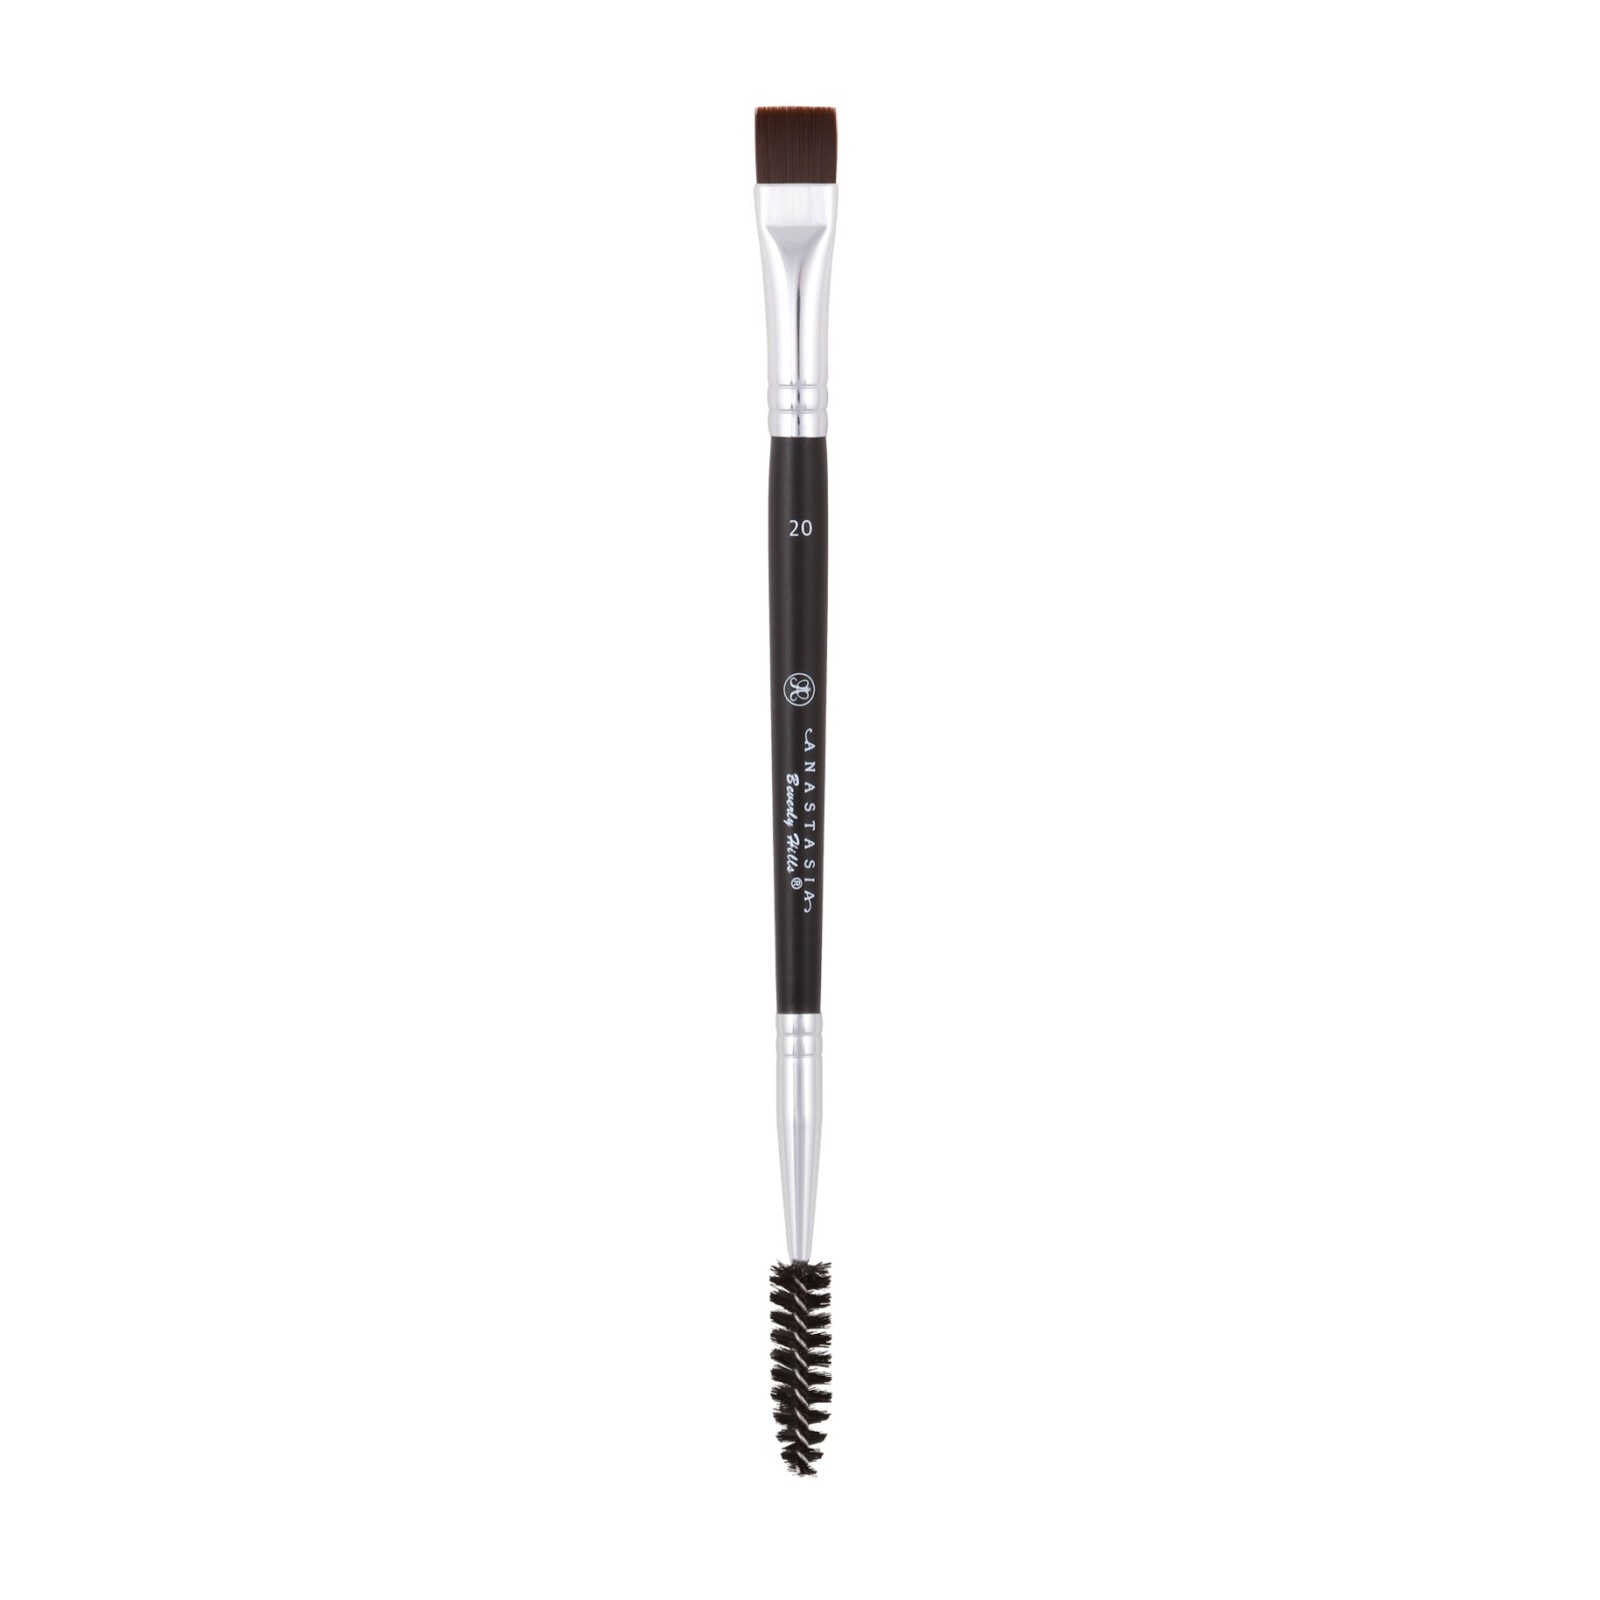
Step One: Wash and moisturize skin including lids and brows. After this has dried or mostly dried put a little eye primer on your brows and do your brows as usual. I use my Anastasia Beverly Hills (ABH from here on out.) Straight cut Duo brow brush #20 and Urban Decay Eyeshadow in the color Buck from my original palette. I'm doing it this way because I recently ran out of the Precisely, My Brow pencil from Benefit and I won't be making another Sephora order for a couple days so this is my go to back up method that works fine. Then I brush my brows to blend the color and make it natural looking. After I've drawn my brows in I clean that same brow brush off and then dip it in the concealer portion of my Cover Fx Contour Kit in light and line all around the brow right outside the hair. Then I blend it in with that brush. This keeps it in place. After this I take my Kat Von D (KVD) powder foundation and put it on my eyes from lid to brow. Then without dipping it in more foundation I gently pat my brows to set the color with the little bit of powder left on the sponge. Not enough color to notice or wash the brows out, just enough powder to set them.
Then I grab my Urban Decay Anti Aging Primer and Prime both eyes. Now my eyes are ready for the shadow. Do Not do your face makeup until your eyes are done because you will just make a smeared mess and it will look horrible and waste makeup when we go to clean up. I only used the foundation and concealer where the eyeshadow would be going and nowhere else.


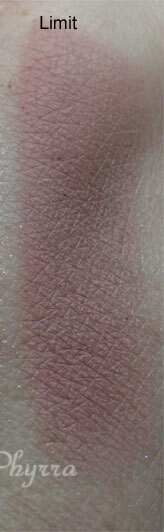
Step Two: With your crease brush or blending brush grab Limit (Always Tap of excess with every dip of every shadow.) And start putting in crease from one corner of the eye to the other in complete crease. Blend well.


Step Three: Do the same with the same brush and same technique in the same place as the last step but this time with the color Nooner. Be sparing with the color. The objective is to build color slowly so always tap off the excess and press lightly with the brush.


Step Four: With your crease brush grab the color Liar and put in outer third and blend into crease. Always use techniques explained above.


Step Five: With Same brush grab the color Factory and put in same place as previous step with same technique.


Step Six: again follow same technique with the same brush as last two steps with the color Mugshot. Then grab your shadow brush and put the color strange on the Lid in technique explained at beginning of tutorial.


Step Seven: with fluffy blending brush put the color Darkside in the outer V. BLEND everything together super well then pat Strange on the lid again to lighten it back up.


Step Eight: With Blackheart and your liner brush, I used ABH Brow Duo Angled Brush #14, line your eyes with a thick wing. Tightline with Darkside on Top and Bottom lashes. ON bottom lashes only put dark liner where the lashes are and no further in. We need to keep this clean for another color. A tip to get this darker is to get your brush a little damp with setting spray or water. I Then used strange right above the top of the crease color to brow to lighten it up and blur the harsh lines. I Then used a shimmer highlight shade from the Too Faced Chocolate Bon Bons Palette Called Satin sheets right under my arch and in my inner eye area to brighten it up. You can use any highlighter or shimmer shade you like but I will show the color I used below. I also ised the color Dust from the naked 3 palette in inner waterline on bottom lashes and underneath lashes underneath bottom waterline.


That still wasn't dark enough for me so I used KVD Ink Liner in the color Trooper on the outer half of my liner only.


I Then used my KVD lock it powder (med 52) all over my face. Then I use my Cover Fx Kit for concealer again (light). Then I use my ABH Glow Kit in Sun dipped. I used the bronze shade (Bronzed.) for contouring cheeks and nose barely (nontouring.) Then I use the Pink shimmer (Moonstone.) for light highlighting on cheekbones, bridge of nose, forehead, cupid bow above lips and chin. Then I highlight over that with the white shimmer (Summer.) shade and add a little of that where I added satin sheets before. I also added a little of the white shimmer (Summer.) on the tops of my breasts to add a little glow to my body so my face doesn't look shiny and the rest of me flat colored skin.
I Then used Bite Amuse Bouche Lipstick in the color Gazpacho and used my ABH Brow duo brush #20 to grab some concealer from my Cover Fx Kit in light and outline the outside of my lips with it to make the lip line super clean and keep the lipstick in place.


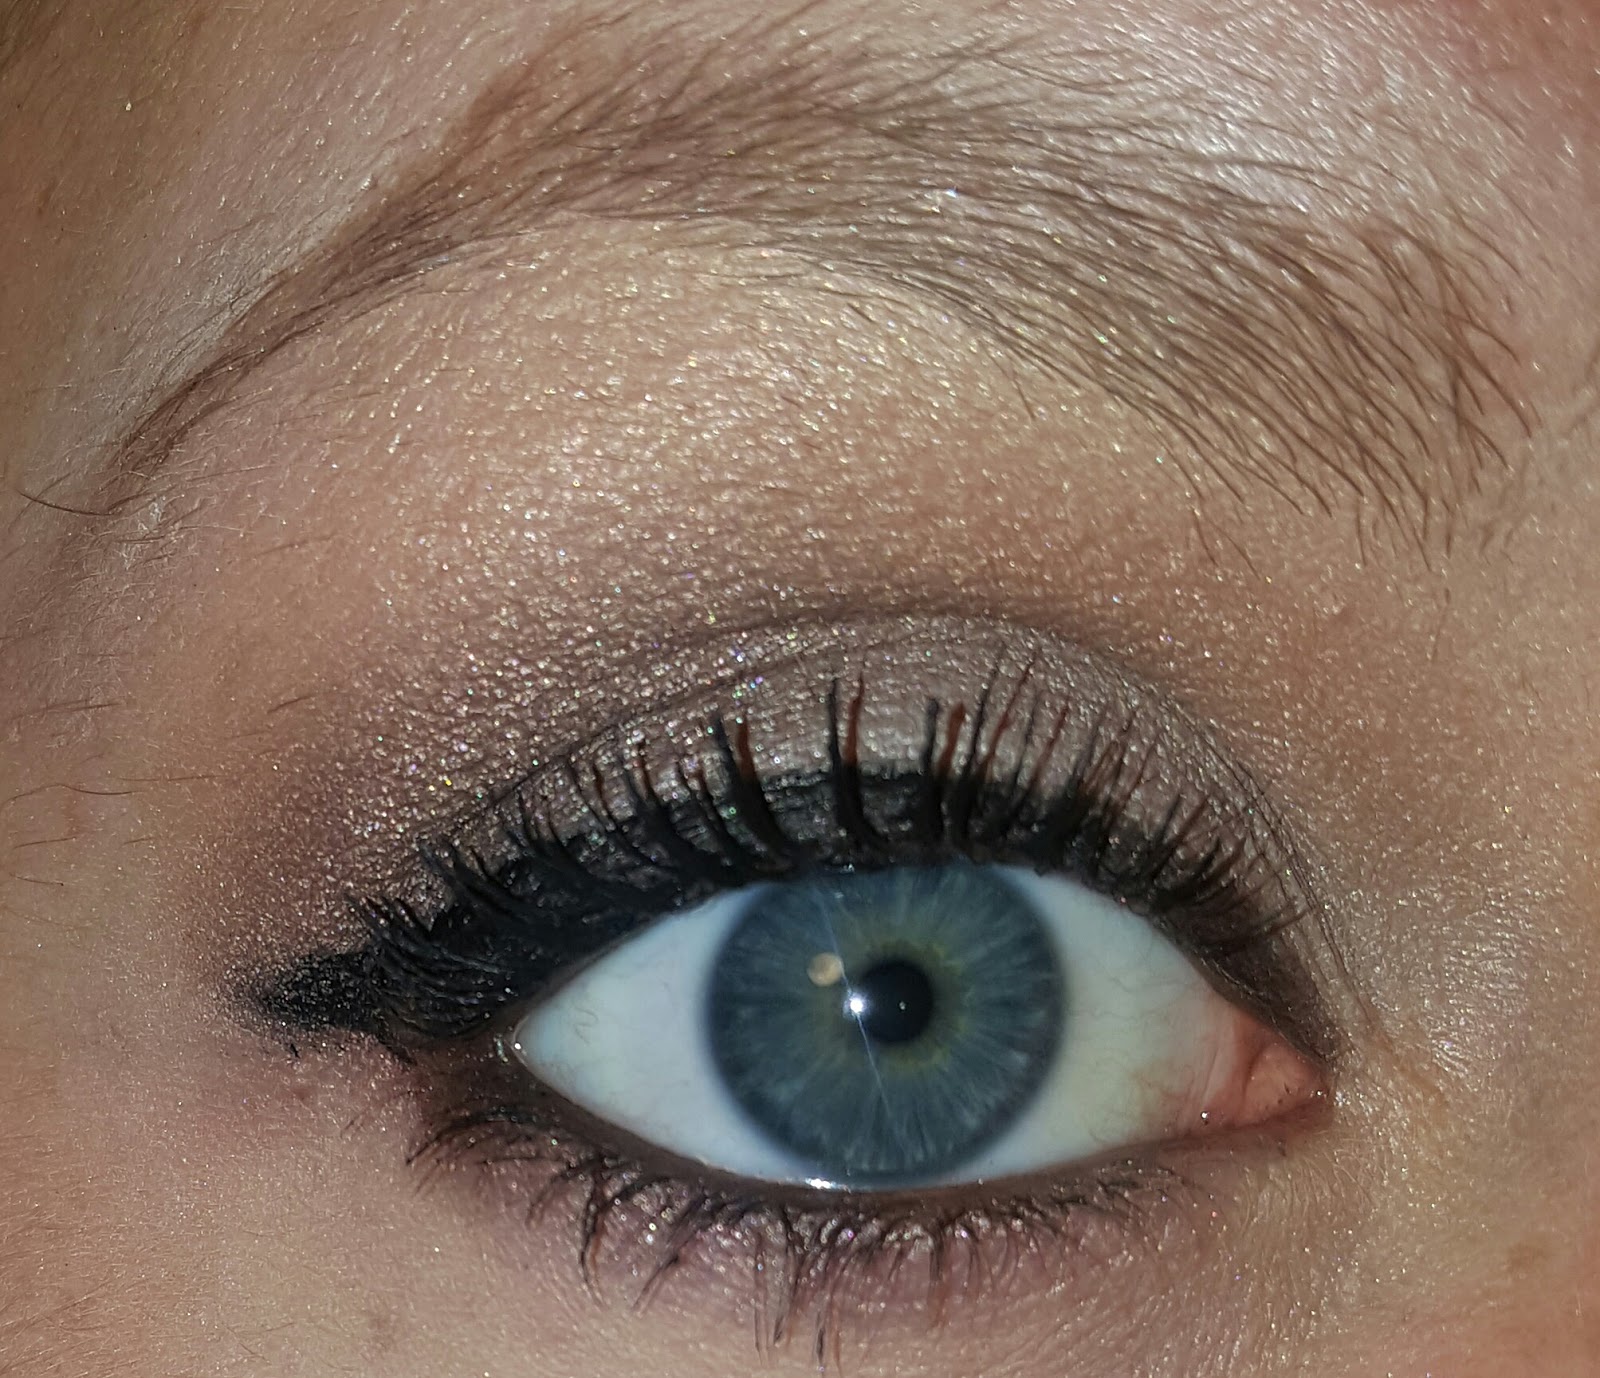
This is the finished look. Keep in mind I just woke up, it's five am and im running a quick errand, just like with most of my tutorials, so I may not look super great but oh well. It's only my face that should matter.
I also usually list the makeup I used right about here but instead I did this throughout the tutorial but everything is listed.


Follow me, share me, plus one me, subscribe, and all that jazz. We aren't far off from the 250 subscriber giveaway when you count all my followers so keep sharing me so we can get those monthly high end giveaways started.
Stay tuned for New posts every day or more!
Twitter @snowbunnybeth90 pinterest @callowayelizabeth instagram @buzzybee1990 facebook.com/yarnandbeauty YARNANDBEAUTY.BLOGSPOT.COM YARNANDBEAUTY.WORDPRESS.COM
YOUTUBE COMING VERY SOON!
STAY BEAUTIFUL BECAUSE THAT'S EXACTLY WHAT YOU ARE, JUST THE WAY YOU ARE!
Beauty is not flawless, it shines even through our flaws. Unique is beautiful!
No comments:
Post a Comment